After finishing the first stage of the scene (the alleyway, agora, and garden), it's now time to move on to an even bigger part - tackling the temple of Apollo and its many mysteries.
Step One: Research
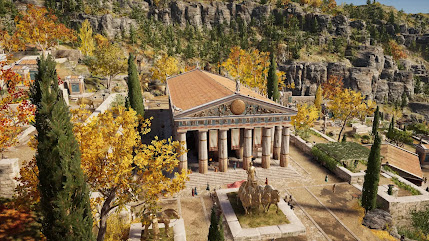
As the artistic director of our project, my main concern is to restore the design of the temple as close to its original as possible. This is an educational game, after all, and an accurate visual is key to introducing our players to authentic ancient Greek architecture. Thus, to ensure the validity of my preliminary research, I requested help from our mentor. Ms. Hoxha provided a brief document that's rich in information about the structure and aesthetics of Apollo's temple at the "navel of the world," Delphi, which gave me important information on its scale, construction materials, layout, and color palette. The floor plans included especially helped to spatially orient myself, finding essential landmarks of the space that I have to translate to our in-game world.
Among all of the information, Ms. Hoxha reminded me that one of the arguably most important features of any classical Greek architecture is the style of its columns. Categorized into roughly three types, the doric, ionic, and corinthian orders are the most influential and iconic. The development behind each style all have intriguing stories inferring to Greek societal structure and artistic progress, and the temple of Apollo presents the doric order. As the accuracy of my depiction of these columns is especially important given their status in architectural history, I paid special attention to their subtle differences in details and structures.
I finally approached my sketch after much research. Although it may seem like I sketch perfect versions of my visions on the first try, this is (unfortunately) not a realistic description of my process. Before I can find confidence in pursuing the final work, I often work through many more iterations of the same concept. The same goes for almost everything I created for this project. Below are exploring sketches for the two main maps I've created for the game.
When I'm satisfied with the sketch, then and only then will I move on to the final illustration. Although I cannot replicate every architectural detail due to the constraints of our 2-D game format, I still tried my best to preserve the key features of the structure, hopefully giving it an authentic representation. Below is the final iteration of the temple of Apollo.
Similar to the process of creating the first map, there are some items that have to be separated from the main PNG in order for the characters to properly move in the area. Thus, I created custom columns, desks, and ornament sprites to ensure visual cohesion.
However, this is not all of the work I have to do for the maps.
Step Two: Interactions
Part I: Puzzle Rooms
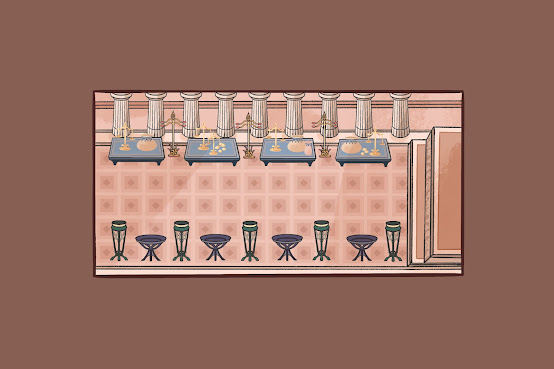
Since it's the second stage of a two-part scene, our team had a collective agreement that the difficulty should be increased accordingly. Our solution to this challenge is to put in additional puzzle rooms - similar to an escape room - that require logic and observation to advance. Surprisingly, this stage is significantly easier for me, as I only need to create a base format of a generic room and put objects on top accordingly. Thus, my main focus became how to present the space to allow players to interact with the room with minimal effort.
As all of my previous maps include big, open spaces, this is certainly a refreshing change. Taking inspiration from other 2-D games, I decided that a one-point perspective from the top would be the best approach. That way, three sides of the walls are visible and can have sprites embedded if necessary. Below are the free sprites that can be duplicated and placed in the space.
The style is another consideration - to keep up with the aesthetics of previous designs, I opted for a similar color palette and echoed many design decisions I have made to indicate that the players are still staying in the same general space. Below are two different versions of the puzzle room: one with archways and one with doors. Play the game to see where the different passageways lead to!
Part II: Endings
Another neat little touch that was added after a thorough check of the first stage is the ending interaction sprites. Along with the dialogue system, they serve to give a visual indicator of certain conclusions to the arguments. Below are the one thief ending and two guard endings.
Step Three: Animations
Having already dabbled into some simple animation work in the previous week, this week's tasks presented a greater challenge. The animations are not simple four-frame walking cycles anymore; I now need to animate an organic object - water droplets. I was admittedly somewhat nervous starting on this part, partially due to my inexperience and partially due to the time constraints, but some google searches of other people's animated illustrations proved to be very helpful. Although not perfect, the end product still performed the need for the game more than enough. Below is the animation.
This process is done in the frame-by-frame animation method (which is often used to animate spontaneous movement).
Step Four: ... And Repeat!
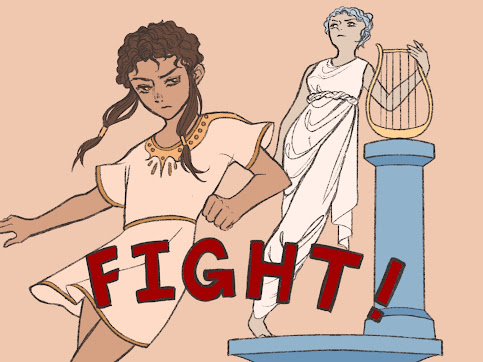
Aside from the new assets and aspects of game visualization I worked on, there are many other things that are repeated from the first stage. More character sprites and icons are added to the collection, along with more battle screens showcasing James' highlight moments. Below are some selections of the work mentioned above.


.jpg)


.jpg)
.jpg)

.jpg)
.jpg)


Comments
Post a Comment